Sistership Corazón under sail, a Searunner 34 in Mexico

Sistership Corazón under sail, a Searunner 34 in Mexico
Searunner 34 CORAZÓN sailing in the Sea of Cortez, México

Wednesday, June 22, 2011

Main Hull Bow Work Continues

     I had no idea that simply removing the headstay chainplate would evolve into such a long-term project.  But it did!  Now, the work is getting closer to being all done, thank goodness.  I added another piece of wood to the edge on both sides and now Etak has a more typical Searunner look to her, at least on this middle bow.

    The summer solstice just happened here in the Northern Hemisphere a day ago, and the summer sun is certainly warming things up here in the greater Los Angeles--Long Beach, California area.  By mid afternoon until around 5:00 p.m., it is getting warm.  The heat is not too bad, but the intensity of the sun is.  Having had both basal cell and squamous cell carcinoma removed from my back and neck, I am cautious to protect myself as much as I can from the damaging effect of the UV A and B.  Thus, the long-tailed and big billed fisherman's hat in one of the photos below.

    Yesterday, June 21, I put the pulpit on temporarily to ascertain its location and fit. I don't have photos of it on the bow yet, but will soon.


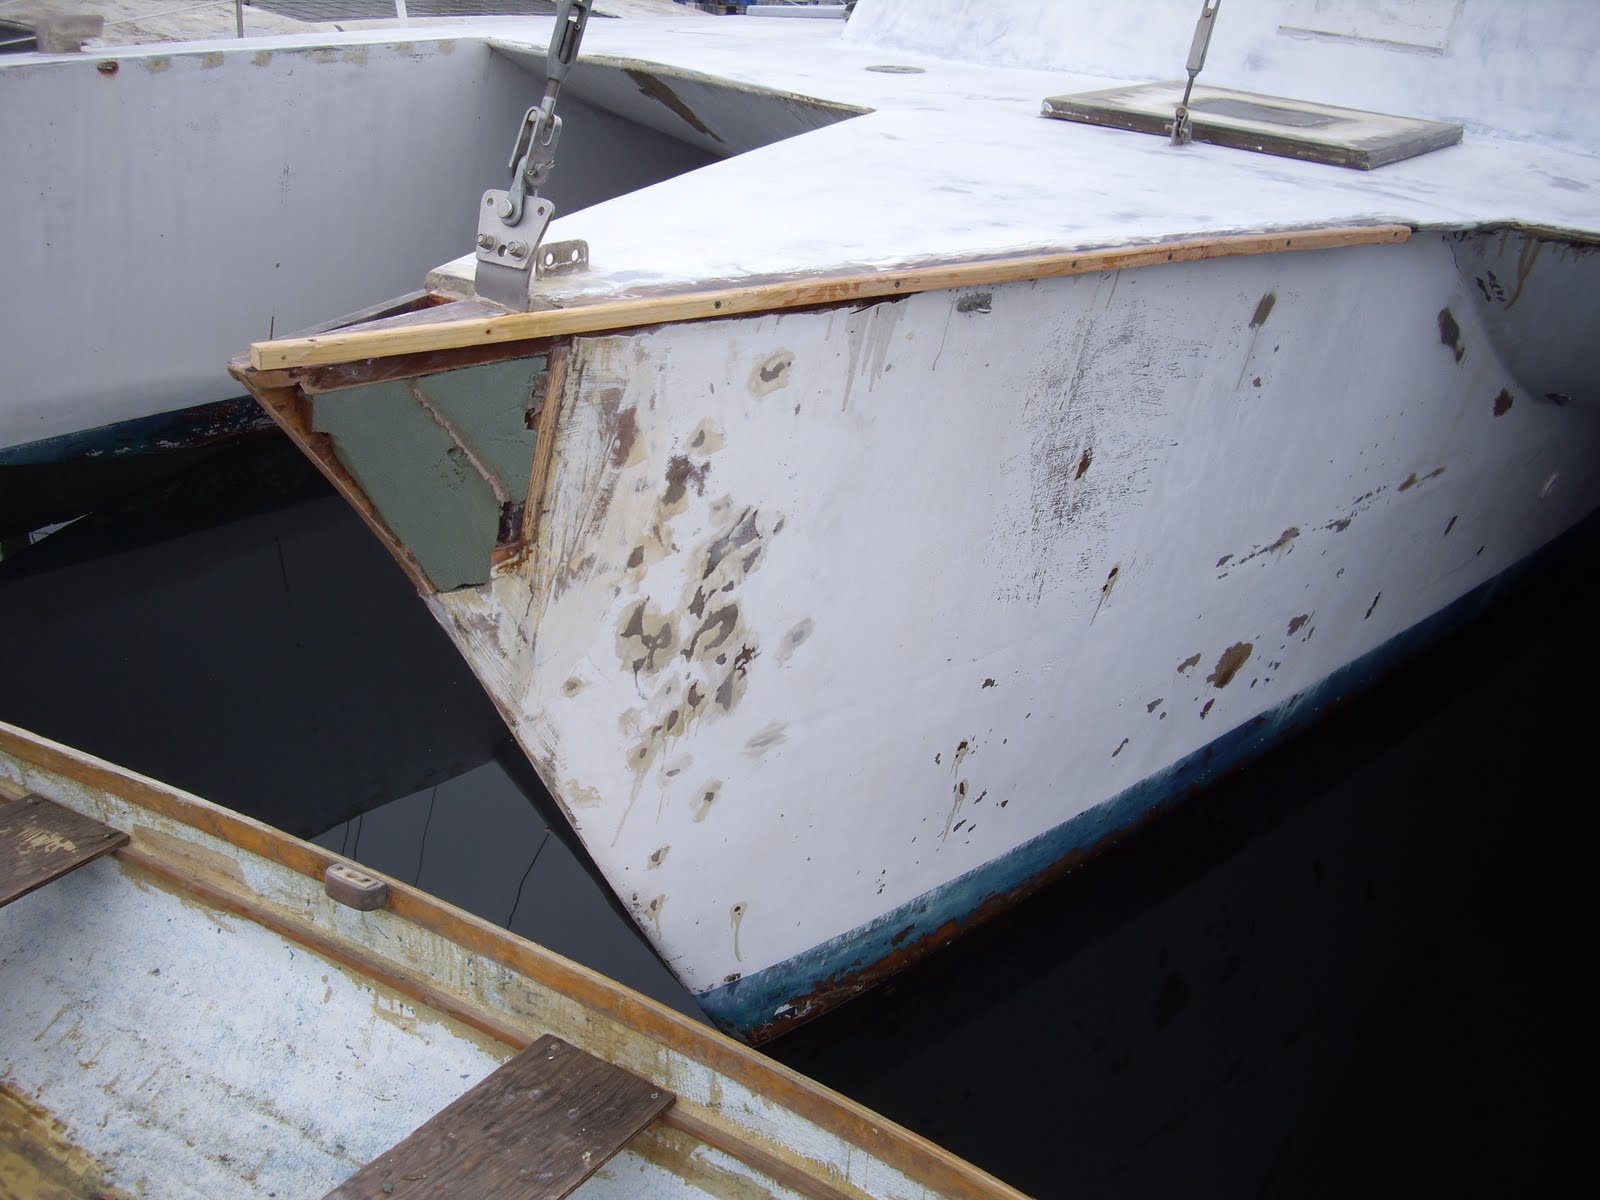
        In this photo above, I am adding the second deck extension or overhang from a strip of furring lumber from Home Depot.  I could not find any vertical grain Douglas Fir.  There was plenty of maple, poplar, and other hardwoods, but only rough 2 x 4's in fir along with other house-building sizes.  A search through the pile of 1 x 2 furring strips yielded a couple with good grain and minimal knots.  This one got split from one end to the other on the table saw tapering from about 1/2" to almost full width.  The remaining half will go to the port side of the bow.


     Here in these two shots above, you can see the foam filling that has been faired, then the add-on of some 1/8" door skin luan held in place with drwall galvanized grabber screws.  They will be removed after the epoxy cures.  This starboard side has the luan attached flush with the hull.  The port side is attached proud of the hull (below) to be faired in with bog since it is slightly off center on that side.


     In this photo above, you can see the second furring strips epoxied to the first strips.


     Rough fairing in has begun.


     Getting closer to the final stage!

     Soon it will be time to return home to Oregon.  The amount of work that must be done to leave Etak ready for inclement weather is a bit overwhelming.  As each day passes, I worry more and more if we will be able to get all the things done before we depart.  Here it is 6:00 a.m. and I am posting to this blog after having been up since 3:00, and before I know it, I must head for the harbor and another day of work.  Yesterday I removed the Farymann engine from its compartment on the port side of the centerboard trunk.  The little (but too heavy) chunk of iron sits in the galley just below where the oven will be.  The companionway ladder is in place, but ony barely so with the diesel beast occupying much of the floor space.  Today's goal is to get into the now empty engine "room" and sand away until I am happy with the surfaces prior to doing some much needed epoxy work.  The ultimate goal is to get a good coat of paint in this area with the engine removed.  I will try to get some pictures today of the engine in the galley and the empty area before work begins.

     Having the permanent sole of the cockpit out, access to this area is much better.  In fact so much better that I am planning on adding the new sole to be non-permanent but totally waterproof.  It will involve a gasketing system and bolt down similar to how valve covers are installed on automobile engines.  Having that access from above simplifies engine removal and replacement so much that engineering a gasketed-down sole is worth the effort. That little (but heavy) diesel still comes out into the galley via a strong aluminum tube with traveler track and car bolted it.  I lift the engine from its bed with a turnbuckle to the traveler car and slide the beast aft to the opening into the galley.  Then with a 4 x 4 timber or similar across the companionway sliders, I use a block and tackle arrangement to hoist the engine enough to relieve the load on the turnbuckle and swing it to the sole of the galley.  The access from above is simply for me to lean into and attach the various items used to move the engine, remove the alternator (it makes it a little wide to come out through the opening into the galley), and have a bit more work room.  In a vessel this small, the engine cannot be lifted out through this sole opening as it is only about a foot wide.

Friday, June 10, 2011

ETAK's Rhinoplasty

    When I learned from co-designer John Marples that older Searunners with the original 304 stainless steel chain-plates and fittings should have them changed out for more corrosion resistant 316 SS, I began the process of following his advice.  He generously send a copy of the plans page with all the dimensions of the various fittings.John has made this information available to all Searunner owners.  So, if you have a Searunner and want the updated page, contact John directly via his website.

  One of the most difficult to get to was the chain-plate of the head stay.  It is back about a foot from the tip of the bow nose.  With nephew Frank, we attacked the job with Frank's Saws All (sp?).  Here is a head-on picture of the bow with the chunk of nose whacked off:


    Six 3/8" bolts and bedding compound held the old chain-plate in place.  The nuts were inside and barely accessible through a large circular hole in the first frame.  I just was able to get a wrench in and on the bolts at full-arm's length.  Doreen was able to hold the bolts from turning as she stood in the dinghy when it was placed in front of the bow at 90 degrees to it.

After removing the old chain-plate and bolts, I needed to seal the old plywood prior to installing the new 316SS plate.  First I added 17 oz bi-axial fiberglass cloth and epoxy resin in a couple of layers as seen here:


       Now the area has been sanded and the holes drilled through for the new chain-plate.

     This picture above shows the new plate in place and bedded with 3M 4200.

     In this photo above you can see that I routered out to the requisite depth a section to cover the new plate on the bow.  Obviously really a rough job, but I did not have a guide, just the "good-eye" approach (it obviously wasn't all that good!).

  Here is that same ply plate covering the new chain-plate with the nuts exposed.  It was much easier to attach the chain-plate with the nuts on the outside!  This ply cover is epoxied on but should anyone ever need to get to the nuts, they will be (somewhat) accessible.  Some additional 3M 4200 has since been added to cover the nuts and seal the area from any possible intrusion of water (highly unlikely once everything is covered and sealed).


   Above in this photo, you can see the 3/4" plywood cover from a different angle.  Note the 1/4" 316SS attachment to the chain-plate.  On the plans page John Marples sent, it calls for 3/16" SS, but he added a hand-written addendum that it could be 1/4" thickness.  Wanting the extra strength of the thicker plate and contemplating adding synthetic standing rigging as Corazón has, I fabricated this additional piece in 1/4" 316 SS for the Colligo dead-eye lashing terminator. Still missing is one 1/2" bolt to add to the two 3/8" bolts holding the small plate to the chain-plate.

      In order to put the rest of the nose one, I needed to make up some sort of add-on piece to bring the bow back to a point.  Some scrap pieces of mahogany and some more 3/4" plywood get epoxy coated prior to assembly (below)


Assembled!


     Of course, she could not have a complete nose job without some "plastic" surgery, so the next step was to add some plastic to her nose (plastic in the form of foam):
     Believe me!  The nurse almost got fired after such a bungled taping job!


     The surgeon got out his scalpel and went to shaping the new nose:
      Note above that a strip of 3/4" by about 1" trim has been added to the port side of the bow.  I noticed that the plywood top of the entire bow is off on the overhang on this port side, so I am adding a piece in to balance the two sides dimensionally.  The starboard side will get a much small add-on and the typical Searunner clipper bow and flare will be enhanced over the original point of the bow which came to a very narrow and sharp beak-like point.