When I learned from co-designer John Marples that older Searunners with the original 304 stainless steel chain-plates and fittings should have them changed out for more corrosion resistant 316 SS, I began the process of following his advice. He generously send a copy of the plans page with all the dimensions of the various fittings.John has made this information available to all Searunner owners. So, if you have a Searunner and want the updated page, contact John directly via his website.
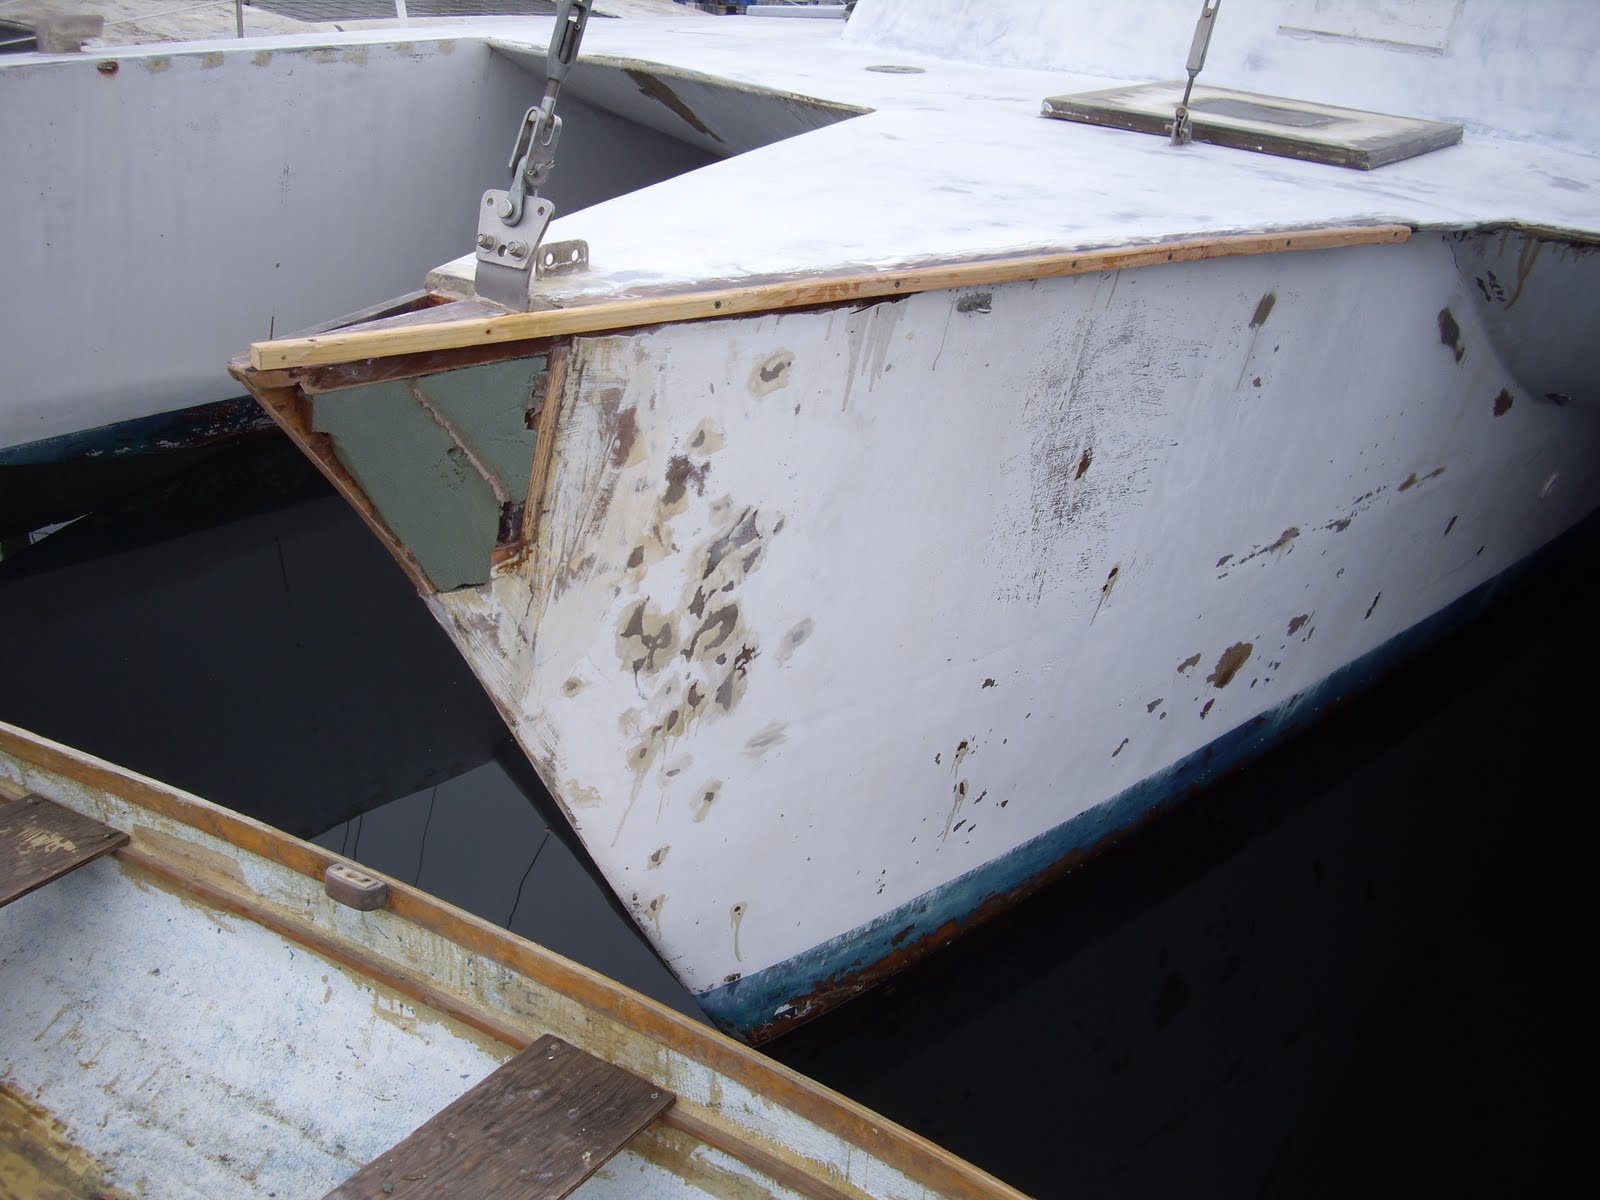
One of the most difficult to get to was the chain-plate of the head stay. It is back about a foot from the tip of the bow nose. With nephew Frank, we attacked the job with Frank's Saws All (sp?). Here is a head-on picture of the bow with the chunk of nose whacked off:
Six 3/8" bolts and bedding compound held the old chain-plate in place. The nuts were inside and barely accessible through a large circular hole in the first frame. I just was able to get a wrench in and on the bolts at full-arm's length. Doreen was able to hold the bolts from turning as she stood in the dinghy when it was placed in front of the bow at 90 degrees to it.
After removing the old chain-plate and bolts, I needed to seal the old plywood prior to installing the new 316SS plate. First I added 17 oz bi-axial fiberglass cloth and epoxy resin in a couple of layers as seen here:
Now the area has been sanded and the holes drilled through for the new chain-plate.
This picture above shows the new plate in place and bedded with 3M 4200.
In this photo above you can see that I routered out to the requisite depth a section to cover the new plate on the bow. Obviously really a rough job, but I did not have a guide, just the "good-eye" approach (it obviously wasn't all that good!).
Here is that same ply plate covering the new chain-plate with the nuts exposed. It was much easier to attach the chain-plate with the nuts on the outside! This ply cover is epoxied on but should anyone ever need to get to the nuts, they will be (somewhat) accessible. Some additional 3M 4200 has since been added to cover the nuts and seal the area from any possible intrusion of water (highly unlikely once everything is covered and sealed).

Above in this photo, you can see the 3/4" plywood cover from a different angle. Note the 1/4" 316SS attachment to the chain-plate. On the plans page John Marples sent, it calls for 3/16" SS, but he added a hand-written addendum that it could be 1/4" thickness. Wanting the extra strength of the thicker plate and contemplating adding synthetic standing rigging as Corazón has, I fabricated this additional piece in 1/4" 316 SS for the Colligo dead-eye lashing terminator. Still missing is one 1/2" bolt to add to the two 3/8" bolts holding the small plate to the chain-plate.
In order to put the rest of the nose one, I needed to make up some sort of add-on piece to bring the bow back to a point. Some scrap pieces of mahogany and some more 3/4" plywood get epoxy coated prior to assembly (below)
Assembled!
Of course, she could not have a complete nose job without some "plastic" surgery, so the next step was to add some plastic to her nose (plastic in the form of foam):
Believe me! The nurse almost got fired after such a bungled taping job!
The surgeon got out his scalpel and went to shaping the new nose:
Note above that a strip of 3/4" by about 1" trim has been added to the port side of the bow. I noticed that the plywood top of the entire bow is off on the overhang on this port side, so I am adding a piece in to balance the two sides dimensionally. The starboard side will get a much small add-on and the typical Searunner clipper bow and flare will be enhanced over the original point of the bow which came to a very narrow and sharp beak-like point.


Hey Millar, Etak likes her new nose. Great job!
ReplyDelete(Doreen, the boat sander)
Thanks, Sanding Lady Doreen. You are doing a good job on the topsides with your sandpaper. Looking better all the time.
ReplyDeleteNose Doc Rann
Very nice work. And you are absolutely right,the forestay timbers on the Searunner designs and the forestay tang as well. On our old Searunner 31, the forestay tang had pulled aft so far that it allowed the stemhead timber to completely rot out. We found out how bad it was when we were sailing for the marina for a dry dock session when the entire forestay pulled out, flipped through our genoa, and just missed decapitating my wife. Very nearly lost the mast. Fortunately, the Constant Camber designs have a slightly different configuration which does not require the tang to be bent aft. Should be a lot more resistant to flexing and dry rot.
ReplyDeleteIt was a great design of the boat and it looks so nice. Great job, You have really done such nice work ,great going.
ReplyDeletenose surgery
Doreen was able to keep the bolt from turning as it was in the boat when it was placed in front of the arc. The nuts were inside and only accessible through a large circular hole in the first frame.
ReplyDeleteThe starboard aspect will get a much little add-on and the regular Searunner clipper bow and size will be increased over the unique factor of the bow to a very little and razor-sharp beak-like factor.
ReplyDelete