I scored today because my first mate and my stoker (you tandem bike fans know this term) lent a helping hand. While I patched an old hole where a Nicro Fico solar vent used to be, she stripped old paint from some aluminum cleats and later some paint around the edges of the single berth.
After filling the hole in the cabin top I moved into the single berth to do some final sanding after Doreen had finished cleaning up the residue of stripped paint. She moved outside and did some orbital sanding on the decks while I fiberglassed the bunk with that same 4 oz. cloth I used on the starboard side berth a few days ago.
Now it is time to order some more resin. I have been using John Greer's (http://www.jgreer.com/) AeroMarine 300/21 no-blush epoxy with great results. John sells it at a very reasonable price. It is about the speed of cure as West 206 hardener and resin. The work time is good and it sands nicely when cured. Because both hardener and resin have about the same specific gravity, I use a gram scale to weigh out the resin and hardener (2:1 mix). It is so much more accurate than pouring into containers and judging the two-to-one ratio visually. The little gram scale goes to 5 lbs. and I found it at a Goodwill retail store for $3.00. I did have to replace the button batteries and they cost more than the scale! I always have the amount I need accurately measured to within one gram, so my mixes are consistently the same.
Yesterday I was able to cut the chainplates from the 3" by 3/16" plate stainless 316L. It IS hard to cut! One cut had to be by hand with the hacksaw because the band saw will only cut material 12 inches or less. But after the laborious (heroic?) effort of the one cross-cut, I was able to do the other two cuts with the band saw. So much easier! Now the two 18" long primary chainplates are ready for hole drilling, and the bow chainplate is ready for the same operation and an easy bend of 23 degrees to align with the headstay.
Tomorrow I work alone since my helper is heading off to be with her sister for the day. I will miss her, but still I will get a lot accomplished. I am on a roll now! Come on weather, stay nice!
Sistership Corazón under sail, a Searunner 34 in Mexico
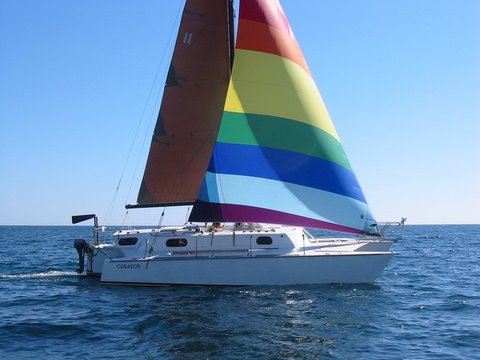
Searunner 34 CORAZÓN sailing in the Sea of Cortez, México
Thursday, December 30, 2010
Monday, December 27, 2010
4 oz cloth, a joy to work with
All that sanding and stripping is paying off. I finally got the starboard double berth to the point of putting some glass on today. My body aches from all the contortions in order to get at the area, but when I put in the 4 oz cloth, it went down on the bare plywood beautifully! About 75% of this berth is covered now and I will finish up tomorrow. The cabin walls still need sanding and stripping, but at least the area under the mattress is almost done. Once I get all of the areas covered with fiberglass cloth I intend to, I can start putting on the finish coat of paint. First I plan to experiment at home with some hatch covers with a new paint I have found. I will follow up with some photos and details on this part of the project before long. The upside is that this product is very environmentally friendly, and doesn't cost an arm and a leg as two-part linear poly paints do, and it is safe to use inside. I once almost knocked myself out with fumes working with alkyd paint in the minuscule engine compartment. Never again!
Douglas Fir plywood cracks
Here it is a couple of days past Christmas '10 and I am back at it again. In the starboard berth area, I am stripping the old paint down to wood in order to permanently seal the Douglas Fir that invariably opens with time. This plywood is notorious for developing "checks" in the grain with expansion and contraction from temperature changes. The only way I know to eliminate it is to cover it with some fiberglass cloth and epoxy resin. Resin alone just won't do it. It needs the rebar effect of cloth to hold it together.
I have tried all the common means of removing the old paint: sanding, stripping, heat gunning. The easiest seems to be to strip it, then heat gun it off, with a final light sanding prior to applying the cloth and resin. But, the reality is, even that is not easy: fumes of the stripper, scraping of the loosened paint, square-inch-by-square-inch removal of the remaining paint with the heat gun. At least it is cool weather now, otherwise the heat build-up in the berth area would be intolerable.
During the rainy period that broke lots of records here in SoCal, along with birthday celebrations, Christmas day family dinner and gift opening, plus a few other interruptions, I was able to cut out 316L stainless steel parts for the rudder. Now some of them need to go to a welder and machine shop for final fabrication. The new rudder has a layer of 17 oz. biaxial cloth on the leading edge. It needs a weave-filling coat of epoxy and more fairing. It will be strong and totally encapsulated in epoxy. The problem with the old one was just the opposite. It was made with no cloth and eventually the bare resin coat opened enough to let salt water in along with shipworms. If you looks at the picasaweb pictures I have posted, you can see the damage the worms did. My biggest concern now is the skeg which probably will need the same treatment as the new rudder (IF I am lucky and don't have to replace it too!). The major problem with the skeg is being underwater and there is no easy way to get to it for a detailed inspection without a haul-out or lifting the stern until it clears the water.
But, as I tell myself, each project, one at a time, until they all are dealt with. Actually it is usually about three or four at a time that are in progress.
Soon I will be removing the headstay chainplate to replace it with one of 316L 3/16" stainless steel. When it is in place, I can then finish the plastic surgery nose job on poor ETAK. She looks terrible with that sawed-off nose!
Friday, December 17, 2010
Searunner 40 Trinity lost, but crew saved
Canadian John Davidson and fellow Canadian Jud Baker are alive and recovering after they lost their Searunner 40 TRINITY about five miles off the coast of Costa Rica. Rescued by the crew of the 695 foot car carrier SUNBELT SPIRIT, the pair suffered sunburns, dehydration, and terribly blistered hands from attempting to row to the coast. The same heavy weather that caused the damage to TRINITY kept them heading further out to sea in their small inflatable The loss is attributed to rough seas which ripped off one of the floats of the trimaran and caused the loss of the mast before the vessel went down. For more details, read the report at 'Letronic Lattitude of the San Francisco Bay area magazine, "Latitude 38:
http://www.latitude38.com/lectronic/lectronicday.lasso?date=2010-12-17&dayid=518#Story2
 Over two years ago my wife Doreen and I drove from home in Oregon to Guaymas, Mexico in order to look at TRINITY for possibly purchasing her. She was on the hard at Marina Seca of Guaymas and we did a thorough review of her before considering getting a survey done. She just did not meet my expectations of quality within and we decided against going any further toward the purchase. In fact, it was this trip to see TRINITY that convinced me to go the full nine yards and totally refurbish our Searunner 34 ETAK.
What really concerns me is that Trinity lost a float! I have not heard of any Searunners losing a float (or ama as they are also called) from rough seas. Some have been severely damaged on reefs and rocky shores, but to have one come off is quite unusual. There must have been some rot or termite damage in the main bulkheads that hold the amas to the wings and main hull. Plus the 'Lectronic Latitude report indicates she sank. Such a calamity is usually reserved for a ballasted vessel and not a multihull. I need more details on this loss and am looking forward to more reports from the maritime press. Something just seems wrong here.
Owner John Davidson, 65, and crew member Jud Baker, 47, are lucky to be alive despite the loss of their Searunner. One of them grabbed the hand-held EPIRB as they jumped in their inflatable, alerting the Coast Guard that something was amiss at sea. The Coasties finally located the two sailors by airplane on their third day in the dinghy without water, food, or shelter from the sun. Their inflatable flipped during the three days at sea but fortunately the two men were able to right it and get back aboard. It was the last minute grabbing of the EPIRB that undoubtedly saved their lives.
All of sailors and particularly Searunners are happy captain and crew are alive, and sad that a Searunner came to this fate. We hope their dream is still with them and they can acquire another vessel and continue on.
http://www.latitude38.com/lectronic/lectronicday.lasso?date=2010-12-17&dayid=518#Story2

What really concerns me is that Trinity lost a float! I have not heard of any Searunners losing a float (or ama as they are also called) from rough seas. Some have been severely damaged on reefs and rocky shores, but to have one come off is quite unusual. There must have been some rot or termite damage in the main bulkheads that hold the amas to the wings and main hull. Plus the 'Lectronic Latitude report indicates she sank. Such a calamity is usually reserved for a ballasted vessel and not a multihull. I need more details on this loss and am looking forward to more reports from the maritime press. Something just seems wrong here.
Owner John Davidson, 65, and crew member Jud Baker, 47, are lucky to be alive despite the loss of their Searunner. One of them grabbed the hand-held EPIRB as they jumped in their inflatable, alerting the Coast Guard that something was amiss at sea. The Coasties finally located the two sailors by airplane on their third day in the dinghy without water, food, or shelter from the sun. Their inflatable flipped during the three days at sea but fortunately the two men were able to right it and get back aboard. It was the last minute grabbing of the EPIRB that undoubtedly saved their lives.
All of sailors and particularly Searunners are happy captain and crew are alive, and sad that a Searunner came to this fate. We hope their dream is still with them and they can acquire another vessel and continue on.
Thursday, December 16, 2010
Sanding, sanding...
These old wood and epoxy boats need too much sanding! Both Doreen and I are dock slaves, sanding away on the interior and exterior. Douglas Fir plywood is notorious for checking, or getting little splits in the grain from contraction and expansion of the soft and hard grains. We have most of the topsides under control and under a layer of epoxy resin and fiberglass cloth. The interior, however, is a horse of a different color. Only resin was originally coated on this side of the plywood, no cloth. About 20 years ago I laboriously painted the interior and had it quite sharp for a home-build sailing vessel. But time took its toll and the wood checked.
We have spent several days sanding, and today using paint stripper to get down to bare wood. The 4 ounce cloth should be here tomorrow according to UPS and I will soon be ready to get some cloth on the wood to act as a screed and hold the checking in place.
If we look at the BIG picture it is a bit overwhelming, so we try to take each day at a time and only concentrate on the job at hand. One day, Doreen says, it will start to all fall in place and we will see the light at the end of the tunnel.
Rain is predicted for the next several days here in sunny Southern California, so all the work will be below-decks oriented. One major project is rebuilding the oven and stove. It is a seat-of-the-pants engineering feat that I frequently find myself enmeshed in. The original stove had no safety knobs for the burners and oven, so I am replacing the burners with some I pirated from a Cabela's camp stove I bought while in Eastern Washington a year or so ago. Pictures will follow.
Sunday, October 17, 2010
A new rudder under construction
The original rudder on ETAK sits in my garage. I had no idea that the "termites of the sea," the infamous teredo worm is not a worm at all but a bivalve mollusk. When these shipworms bore into submerged wood, bacteria in a unique organ that is a gland permits them to digest wood fiber which is what happened to this rudder. The epoxy coating was not thick enough on the original, and once they had access to the wood, in they went! The new rudder will have a heavy coating of epoxy fiberglass to protect it from these critters.
Friday, October 15, 2010
The name ETAK
More often than not, I get the question, "What does ETAK mean?" or, "Where does the name ETAK come from?"
That was the question I posed to the the builder when I met him. His answer: "Get a copy of We, The Navigators, by David Lewis and you will find the answer there. It is not K-A-T-E spelled backwards!" he winked and said.
Wikipedia says of Lewis: "... he was a sailor, adventurer, doctor, and Polynesian scholar. He is best known for his studies on the traditional systems of navigation used by the Pacific Islanders. His studies, published in the book We, The Navigators, made these navigational methods known to a wide audience and helped to inspire a revival of traditional voyaging methods in the South Pacific."
I found a copy and read that ETAK was a central tenet of the navigational system used by these early voyagers. Lewis' obituary is a telling story of a unique explorer and worth reading . Go here to read.
However, you will need to read his book mentioned above for a clearer understanding of the term ETAK.
Another good source for reading about ETAK is from Emmy Award-winning television host Stephen Thomas (This Old House). His book, The Last Navigator, details much of his sailing experiences that lead to his learning to navigate in the ancient method of the Islanders of the Pacific as he studied among them. Click here to read this informative introduction to Thomas's sailing experiences in the South Pacific.
Still, however, in this link the term ETAK does not appear. You will need to read a copy of one of these books (or better yet, both) to get a good handle on the concept of ETAK.
This is obviously not a good explanation. If I could provide a succinct one, I would! But I have elected to keep the name the same despite the confusion I have in trying to share its meaning with those who ask.
Wednesday, October 13, 2010
ETAK Searunner 34 Brown Marples Trimaran
No, unfortunately this picture is not ETAK. What you see is a Searunner 34 by the name of CORAZÓN. Sailing friend Jack owns this one, and she has been improved since even this photo was taken.
This blog will detail the history of the second Searunner 34, ETAK, to hit the water, back in the late 70's of the last century.. She lies forlorn in an old marina in Wilmington, California awaiting patiently the return of her current owner to continue the total redo that began sometime in the recent past.
I met the builder of ETAK in the summer of 1990 in San Diego when he was care taking this 34 for the then owner who lived in Calgary, BC, Canada. Doug McGraw had built her in 1977. As I recall the conversation, it went something like this: "I had a four year window of time for cruising with my wife. I could build in one year, and cruise for three, or build over three years and cruise for one. I chose the former."
While she was built to the plans and well, cosmetically she lacked a lot. Despite her lack of car-body smooth finish and beautiful furniture quality joinery below, she was stout and pretty. I fell in love with her...And bought her from the owner in Calgary.
But first, a little history on the ingenious design of the Searunner series of three hulled sailing craft from a bygone era. (to be continued...)
As time goes along, bits and pieces will be added to this blog bringing you, dear reader, up-to-date on the status of this old gal, as I bring her back to cruising status. Photos of the past, and current ones of projects going on will be added. Plus links to other Searunner information on the internet, forums of interest, and related websites. So, stay tuned....!
Subscribe to:
Posts (Atom)